The first time I saw these DIY sea candles, it was love at first sight. I love the sea, as does everybody, so I jumped at the chance to try making these at home.

Source: Jin’s DIY
I’ve been making my candles from soy and beeswax, so I was a bit hesitant to try gel candles. Happily, I found a way to make it all work out in the end.
The great thing about gel wax is that it makes for some really beautiful candles. If you’ve ever seen light fall on one of these, it is a sight to behold. They appear iridescent and glowing. Very eye-catching indeed!
Unlike our other candle tutorials, this particular sea candle project is a bit more complex. Apart from learning a new crafty skill, you will end up with pretty decor for your bedroom or living room that you’ve customized to your own taste.
You can also make these during the holiday season when you’re agonizing over something unique and memorable to gift to your friends and family.
Here’s my step-by-step guide on how to make homemade sea candles.

How to Make Your Beach Themed Candles
Materials
- 1 kg of gel wax
- Shells
- Coral (any color)
- Plastic fish ornament
- 400 g of sand
- 250 g gravel (any color)
- Candle dye (any colors)
- Fragrance oil (specially formulated for gel wax)
- Glass jar
- Wick tab
- Cotton wick
- Double sided tape
- Pan or double boiler to melt wax
- Paper cups (about the size of your candle jar)
- Preserved flower (optional)

Video Explainer
I normally place the video at the end but just for this project, I believe you’ll find it easier to follow the written instructions if you watch the video first. It’s an easy watch and quite mesmerizing!
(If the English subs aren’t showing, toggle the CC at the bottom of the video player.)
![[ENG SUB] 바다캔들 만들기 / DIY Sea candle , How to make a candle](https://completehomespa.com/wp-content/plugins/wp-youtube-lyte/lyteCache.php?origThumbUrl=https%3A%2F%2Fi.ytimg.com%2Fvi%2FhRq6JK8tL1M%2F0.jpg)
Procedure
- Get your wick and glass jar. Affix the wick to the bottom of the glass jar with double sided tape.
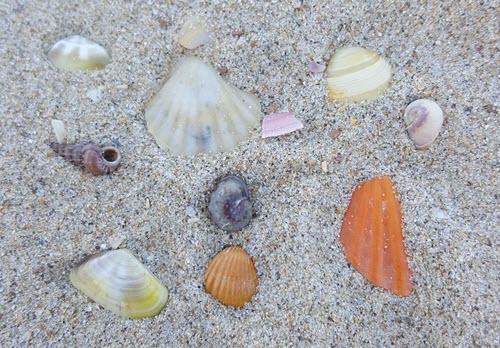
- Next, it’s time to decorate. Pour an inch of sand/gravel mix into the jar. Create a tasteful beach scene with your pebbles, shells, twigs, and other beach-themed materials.

- If you are using flower sprigs or twigs that may burn, make sure to position them against the glass and the farthest from the wick to keep them from burning when the candle is lit.
- Once you’re done decorating, make sure that your wick is straight. You can tape it lightly to a pencil placed across the top of the jar. Or, you can use a clothespin or a pair of chopsticks to keep it in place.
- Next, melt the gel wax in your double boiler. The melting point is 194°F and the pouring point is 212°F.
- In a sturdy paper cup, pour some of your melted gel wax. Add your dye and stir with the handle of a stainless steel spoon. Be very sparing with your dye. You want a very light color.
- Add the fragrance after. Use 5% of the fragrance oil compared to the wax.
- Finally, pour your mixture into your jar. Make sure to pour slowly and steadily. This will create fewer bubbles and keep your decor from being moved around.
- For a multi-colored candle, use a different dye color for each layer. You can also make the bottom transparent and the top layer colored for a fantastic effect.
- Leave the candle to harden overnight. Remove your chopstick (or pen or clothespin) from the wick and trim it leaving around 5 mm to burn.
Once you get the hang of the process, you can adjust the colors, fragrance, and decorative materials according to your preference.
Pro Tips
- Be careful when handling your wick. If it has a gel coating, it can make your otherwise clear candle murky.
- If your hands are too big to fit in the jar or your jar is simply too narrow and deep, you can use a pair of chopsticks to reach inside.
- Sprigs of dried flowers, twigs, and plastic figurines definitely make a candle prettier but these may burn. To keep them from burning, choose a wide jar so you can put them far from the wick.

- Do not use wood to stir melted gel wax. It will make your wax murky. Instead, use a stainless steel or metal device (like the handle of a spoon or fork, or a metal chopstick.)
- If you or your giftee is sensitive to scents you can pass up on the fragrance. In any case, make sure to only use fragrances meant specially for gel wax.
Are Gel Candles Safe?

Via hgtv.com
Sadly, the answer is not completely. Gel is more volatile than other traditional candle mediums. There is a chance that your gel candle can catch on fire while it’s burning.
Another danger is that it can get too hot. When this happens, the glass container can actually explode. If you’re sitting by it, you could get burns from the gel or hit with glass.
Here are some ways you can mitigate these risks:
- Keep an eye on your candle when it is lit.
- Get glass jars that are specifically made for candles. These are thicker and stronger than ordinary glass jars. They can withstand higher heat.
- Don’t pick up and move your gel candle when it’s hot. Wait for it to cool before moving it.
If you or your giftee are into organic and natural products, you will most likely want to avoid gel candles. Gel candles are made from the same petrochemicals as paraffin candles, so you may be exposing yourself to the same toxic compounds.
One very successful workaround I’ve done when I’m gifting for my green friends is to remove the wick altogether and to place a lid instead. Then, I tell them it’s a mood jar. No burning, no risks, and it’s still a beautiful ornament to have around the house.
 Author: Jenn Miller
Don’t be fooled by her innocent baby face. Jenn’s a demanding shopper who WILL push each and every beauty product to its limit.