With so many bills to pay, we sometimes have to learn how to DIY some things in order to have the money to spend on non-negotiable things like, well, food or rent. Save on expensive waxing sessions at the salon by making your own homemade sugar wax. It’s really easy once you know how.
Why We Torture Ourselves

Why do women go to such lengths for smooth hairless legs, arms, and pits?
I still remember the first time I shaved my legs with a razor. I am half Asian and half Portuguese and this has sadly translated to a brain that’s wired to want smooth porcelain skin while having the arms and legs of King Kong.
I was ecstatic when I did my first shave and saw smooth legs for the first time. I was an ignorant teen who soon later found out that 1) hair DOES grow back, 2) it is HELL when it grows back, and 3) there’s no going back once you’ve gone and done it. I even developed a trauma and kept away from personal touch because I felt like a porcupine whenever my hair was in its regrowth and stubbly stage.
Fortunately, I discovered waxing. There’s both pros and cons to shaving vs waxing, but waxing means:
- It takes longer for the hair to grow back
- For some women, the more you do it, the sparser your hair gets
- You avoid razor issues like ingrown hair, chicken skin, and nicks
Different women wax (or shave) for different reasons but it all boils down to feeling happier with the way you feel and look. It’s no different from getting a haircut or plucking your eyebrows. Looking good and feeling good simply makes you feel better about yourself. There is a special satisfaction to be had when you run your hands down your legs and arms and you feel like a lubricated dolphin, as one witty blogger put it.

I tried a waxing salon one time I wanted to pamper myself. But, I think I took them aback with the coarseness of my hair that my waxing lady had a hard time getting it done properly. In the end, I learned how to do it myself just to save face for both my waxing lady and myself.
Hard Sugar Wax vs Soft Sugar Wax
Before we go on, you should know that there are two types of wax.

With hard wax, you just get a stickly gob, flatten it onto an area of skin, and then pull. This works best for fine hair.
Soft sugar wax, however, has a consistency that is more runny. You spread it on your arm with a stick, pat a piece of cloth on it, and then rip it off in one go. This works best for coarse hair.
While having the same ingredients, the cooking time is different. For the steps below, I’ll be teaching how to do the soft sugar wax because that’s what I know best.
This tutorial will be in two parts. The first is teaching you how to make homemade sugar wax (which I love) and second is teaching you how to use it on your arms or legs.

Steps for Making Homemade Sugar Wax
Materials
- 2 cups sugar
- 1/4 cup of fresh lemon juice
- 1/4 cup of water
- non-stick or stainless steel pan
- metal whisk
- pyrex container
Steps
- Put the sugar, lemon juice, and water in the pot. While waiting for it to boil, blend the ingredients well.
- Simmer the mixture for 6 to 7 minutes. Do NOT burn.
- Turn off the heat once the color turns a light honey color
- Cool for a couple of minutes and then pour onto your Pyrex container.
Video
Watch and see exactly how it’s done.
How To Wax With Soft Sugar Wax
Materials
- popsicle stick or a metal butter knife
- pieces of non-stretchy cloth
- baby powder (optional)
- old newspapers
Steps
Now that you have your hot wax safely in your glass container, the next step is to start waxing. If it is your first time with homemade wax, I highly recommend starting off with something easy like the arms and legs. For first timers, avoid the armpits as the skin on there is too thin and sensitive.
- First, ready your waxing area. I usually put old newspapers on the floor because hot wax gets on everything.
- Prep your skin. Wash with soap and water, and pat dry. This is optional but you can liberally sprinkle baby powder on your skin for better adherence.
- While the wax is still warm and a bit thicker than honey, scoop some up with your wooden stick (or metal butter knife). Touch carefully with a finger to test that it is not too hot.
- If tolerable, spread a thin layer on your skin. Make sure to follow the growth of your hair.
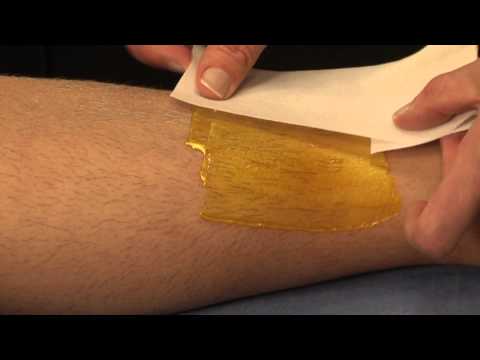
- Immediately place a cloth strip on top of the wax. Press firmly all over to make sure that the cloth adheres to the wax.
- Make sure your flesh is taut and not loose. Now take a deep breath, firmly grasp one end of the cloth, and pull hard and fast AGAINST the grain. The faster you do it, the smoother the result. It stops being painful after a while.
- Do it for the rest of your arm or leg.
Video
Watch and see exactly how it’s done.
Pro Tips
Be sure to read the following to avoid some common mistakes.
Tips for cooking:
- Do NOT use plastic implements. This is common sense but I’ve seen people try to use plastic spoons or containers, and of course, they melt.
- If you are using a regular mason jar and not Pyrex, make sure to have it warmed up a bit to avoid it shattering from the intense heat of the wax.
- The acidity from the lemon juice keeps the whole mixture from turning into hard candy so don’t skip it.
- Avoid burning your wax. Keep an eye on the color of your mixture. Watch out for a burning smell. Keep your heat to the lowest possible setting while still simmering your sugar water.
- If you mix the thickening mixture, you are liable to get bubbles in your sugar wax so try to get the mixing done before it starts to bubble.
Tips for waxing:
- Do NOT put the wax on your skin directly without testing. I did this and I burnt myself. The skin ballooned, formed a watery bubble, and it hurt for weeks.
- If it is too liquidy or too runny, chances are, the wax is still too hot. Wait till it is the consistency of honey or a bit thicker. Always test carefully with a finger.
- If you wax too slowly, you’ll find that your wax will harden too much and you’ll need to warm it again. Warm with your pot, a double boiler, or a steamer. Don’t use a microwave. The microwave brings the temperature of the wax too high, thus making you more prone to burns. (It’s how I burnt myself.)
- I will repeat for emphasis. When spreading the wax, follow your hair growth, but when you rip off the wax strip, go AGAINST. This will ensure a smooth wax.
- The faster you rip off the wax strip, the cleaner the result. Hard as it may be to believe, but it’s also less painful.
- Keep your arm or leg in place when you take off the cloth strip. If you let your arm or leg go with the force of your pull, you’ll end up with torn or unpulled hair.
- You can make your flesh go taut by stretching your arm or leg. Clench your muscles, too. This will make ripping off the cloth strip easier and make for a cleaner finish.
Last Words
Don’t worry if you don’t get it right the first time. The more you do it, the better you’ll become. You’ll see what to adjust and improve and you’ll soon be a DIY waxing expert. (And you can always eat your failures in case you get rock candy.)
 Author: Jenn Miller
Don’t be fooled by her innocent baby face. Jenn’s a demanding shopper who WILL push each and every beauty product to its limit.